Reports
You can create various kinds of lists and reports to benefit your daily work.
Note
Your subscription plan decides which reports you can generate.
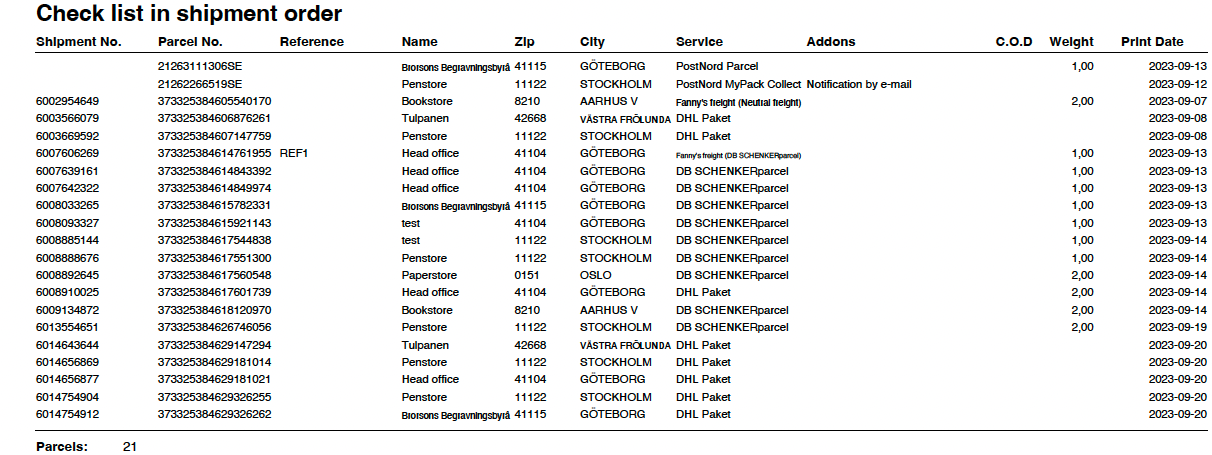
Check list - Get an overview of your shipments.
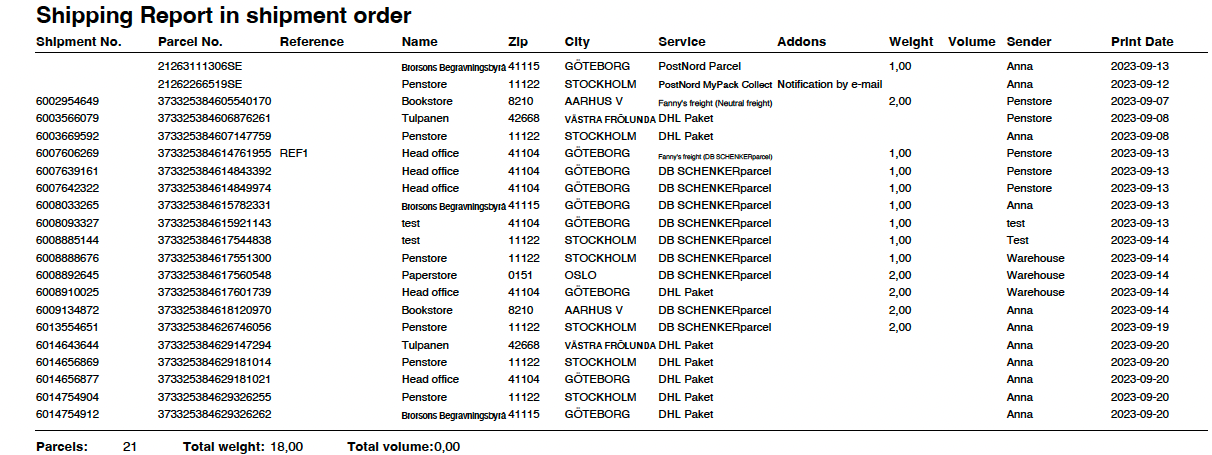
Shipping report - Get a specification of your shipments to hand over to a carrier or dispatcher.
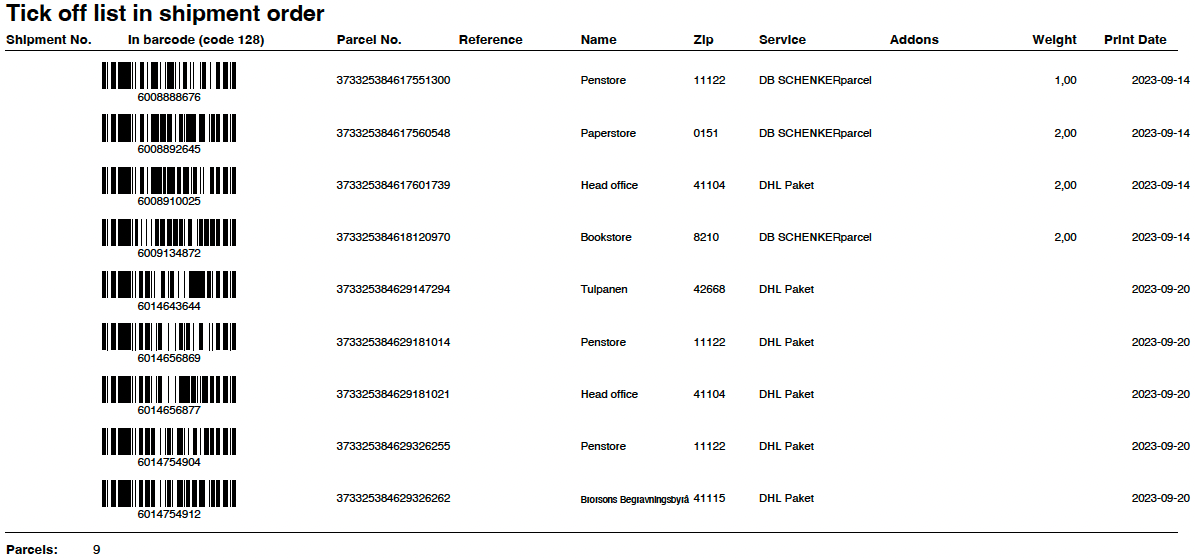
Tick off list - Get a list with a barcode for each shipment for easy scanning.
Price report - Get estimated shipment prices from your shipment history for better forecasting and statistical monitoring.
Delivery time report - Get shipment status based reports to actively work on shortening lead times
Scheduled shipment report - Get shipment history reports on a regular basis for better control of your delivery flow.
Go to History > Shipments.
Enter search values. The search results of the selection you make is what will be included in the report.
In the Presentation section, select the
 tab.
tab.Select "Check list" as Type and select a Sort order.
Click Search to view the list in the GUI.
Click Print or Print PDF to print the list/report directly.
Click Export to export the list/report to a text file or Microsoft Excel.

If you often use the same search values for your reports, you can create a search favorite.
Caution
Some carriers require specific shipment lists as a complement to EDI.
Go to History > Shipments.
Enter search values. The search results of the selection you make is what will be included in the report.
In the Presentation section, select the
 tab.
tab.Select "Shipping report" as Type and select a Sort order.
Click Search to view the list in the GUI.
Click Print or Print PDF to print the list/report directly.
Click Export to export the list/report to a text file or Microsoft Excel.

If you often use the same search values for your reports, you can create a search favorite.
Go to History > Shipments.
Enter search values. The search results of the selection you make is what will be included in the report.
In the Presentation section, select the
 tab.
tab.Select "Tick off list" as Type and select a Sort order.
Click Search to view the list in the GUI.
Click Print or Print PDF to print the list/report directly.
Click Export to export the list/report to a text file or Microsoft Excel.

If you often use the same search values for your reports, you can create a search favorite.
Go to History > Shipments.
Enter search values to find the shipments you want to include.
Check the Price enquiry box if you want to include an additional charge to the results.
Note
If you enter both amount and percentage, the amount is added first and then the percentage is calculated.
In the Presentation section, select the
 tab.
tab.Select "Price report" as Type and select Sort order.
Click Search to view the list in the GUI.
Click Print or Print PDF to print the list/report directly.
Click Export to export the list/report to a text file or Microsoft Excel.
If you often use the same search values for your reports, you can create a search favorite.
Go to History > Shipments.
Enter search values. The search results of the selection you make is what will be included in the report.
In the Status field, choose "Arrived pickup location", "Delivered" or both.
In the Presentation section, select the
 tab.
tab.Select “Delivery time report” as Type and set Sort order to “ShipmentNo”.
Caution
It's not possible to sort by “ParcelNo” since delivery times refer to one entire shipment. Some carriers don't assign shipment numbers, why it's important to specify an order number or reference number to easily identify a certain shipment.
Click Search to view the list in the GUI.
Click Print or Print PDF to print the list/report directly.
Click Export to export the list/report to a text file or Microsoft Excel.
For shipments that haven't been picked up, a value is set in the Dispatching to Arrived pickup location (days) column. When the receiver picks up the shipment, a value is also set in the Dispatching to Delivered (days) column.
Shipments that don't arrive at a pickup location but are delivered directly to the receiver only have a value in the Dispatching to Delivered (days) column.

If you often use the same search values for your reports, you can create a search favorite.
Note
Before you can create delivery time reports make sure you've activated status reporting on your account.
Go to Maintenance > Reports.
Click New report.
If you don't want the report to be activated immediately, check the Disabled check box.
In the Scheduling section, you specify how often the report should be generated.
“Day”, "Week" or "Month" means that the report will include shipments from the previous day, week or month.
In the Basic Information section, you select file format and date type, that is, printing date, shipping date or the date of the latest status update.
Check the columns you want to include in the report.
You can specify selection criteria for the report by clicking Change selection criteria in the Filter section. For instance, you can choose to include shipments to a specific receiver or shipments sent with a specific service.
Note
"Date" is not a valid selection criterion since scheduled shipment reports are based on the previous day, week or month. Date can be used to test the scheduled shipment report by clicking Search when the criteria are selected.
If you want to show, edit or delete a shipment report, use the search function.