Posti SmartShip — Get started
Start shipping
To successfully get started with your shipments you have to be familiar with some core functions and make some initial settings.
Create your address book
You can create your address book in different ways:
Install and configure OnlinePrinter
Create and use printing favorites for efficient book and print
Tip
Integrate your cloud-based ERP or WMS system with Posti SmartShip for a simpler dispatch processing, safer transactions and significant time savings.
Address book
Create and maintain your address book manually, via API or by file import.
You should register at least one sender. You can have several senders with different names and/or address information. They can also have different carrier customer numbers, depending on your needs.
Note
The upper limit for senders/receivers is 30,000.
Go to > .
Click .
Tip
Quick ID is a unique reference to identify a sender, for example "123", and can be used in many different scenarios.
Tip
Check the Receiver box if the sender should act as receiver as well.
Enter Address details.
Enter account information if you use Cash on Delivery or any other service that requires account information.
Enter carrier information, such as customer number.
Caution
Before you make your first shipment you have to add your carrier customer number(s) and other relevant information.
In the Search information section, add category values to enable category search.
In the Default values section, add information, such as sender reference and delivery instructions, that will be set as default values when creating shipments.
You can add a new sender when printing, using standard printing and, if the option hasn't been locked, using printing favorites.
If you want to edit, copy or delete a sender, use the search function.
Go to > .
Click .
Tip
Check the Sender box if the receiver should act as sender as well.
Enter Address details.
Enter account information if you use Cash on Delivery or any other service that requires account information.
Enter carrier information, such as customer number.
In the Search information section, add category values to enable category search.
In the Default values section, add information, such as receiver reference and delivery instructions, that will be set as default values when creating shipments.
You can add a new receiver when printing, using standard printing and, if the option hasn't been locked, using printing favorites.
If you want to edit, copy or delete a receiver, use the search function.
If you keep your address book in another system you can use Address book via API to maintain and synchronize senders and receivers in your address book.
Learn more about Address book via API.
If you keep your address book in another system you can import it to Posti SmartShip. You can add the entries as senders, receivers or both.
The prerequisites are that you can export the name and address information, edit the data and create a tab delimited text file.
Import the file
Go to > or and click .
After adding the file, select ”Standard, address (Tab separated)” as Import type and, in most cases, "ISO-8859-1" as Character encoding.
Check the Also import as receiver/Also import as sender box if the address party should act as both sender and receiver.
Check the Replace matching quick ID box if you want existing information to be replaced by information from the file for address parties with the same unique quick ID.
Tip
It's recommended to select Replace matching quick ID to avoid duplicates.
Click .
If you get an error message saying that the file is incorrect, check the file structure and contents. Make the necessary changes and try to import the file again.
File structure
The import file must have the following structure and content:
ISO -8859-1 (Windows ANSI) or UTF-8 encoding.
Records that are separated by a line break.
Headers (top row) must be spelled correctly and appear in square brackets, for example, [quickid]. You only need to include headers that you want to import. If a header shouldn't be used, it's important to remove it, not just delete the content.
Download an example file and open in a text editor or Microsoft Excel to see what it should look like.
You can use the import/export function to clean your address book, that is, remove duplicates, outdated addresses, etc.
Go to > or .
Search the address book without using search values, which will retrieve all senders/receivers in your address book.
Click .
Edit the file in, for example, Microsoft Excel.
Go to > or .
Search the address book without using search values.
Click .
Caution
You remove the entire address book and it can't be undone. Make sure that you've a correct file to import.
Click to import your updated address book file.
Category values are useful if you want to send something to a group of receivers or remove receivers belonging to a specific category.
You give the receivers a value in one of the category fields, for example "Summer gift 2020" in [category1text], and use that category search value when printing, preferably using batch printing.
If you want to remove receivers, use a category search value and click .
Caution
Make sure you've made the correct selection so you don't accidentally delete the entire address book.
OnlinePrinter
OnlinePrinter is a printing software for printing labels and shipping documents on a physical printer.
Requirements for Windows
Windows 10 or higher
Local system administration privileges
The installation of OnlinePrinter follows the standards for "Windows Installer". The installation file is currently only available in English.
Download OnlinePrinter for Windows.
Requirements for Mac
MacOS 10.13: High Sierra or higher
Local system administration privileges
Download OnlinePrinter for Mac.
Drag the OnlinePrinter icon to the Applications folder.
Tip
If you encounter problems while installing OnlinePrinter, please refer to Troubleshoot OnlinePrinter.
Go to > .
Click and follow the instructions.
Caution
If you use Firefox you may receive a message the first time you use the printer software. You must accept to open the link in order for OnlinePrinter to work properly.
If you use Safari you have to allow OnlinePrinter to open when you make the settings as well as each time you print labels and documents.
Problem | Solution |
|---|---|
Error message saying that the program can't be run on your type of processor or operating system. | You probably have a 32-bit operating system and need to download another installation program. Please contact customer support. |
Problem | Solution |
|---|---|
Error message saying "Java runtime dll is missing". | Download and install the necessary program library. Download |
Problem | Solution |
|---|---|
The program doesn't start. (Mac only) | Go to System preferences > Security and privacy and click "Open anyway". |
Problem | Solution |
|---|---|
The program doesn't start. | Delete the program's working folder and enter new printing settings.
|
Problem | Solution |
|---|---|
Error message saying that the program doesn't show. | Click . |
Problem | Solution |
|---|---|
| Add the following IP network to the firewall configuration: 193.183.118.0/24 193.183.119.0/24 |
The support staff might request an information file from you in order to help you solve a problem.
Go to OnlinePrinter by accessing the application via the system tray. Right-click on OnlinePrinter > Open.
Choose Archive > Create an information file and save the zip file.
Attach the zip file to an email and send it together with a problem description and your user ID to customer support.
Printing favorites
To quickly get started with Posti SmartShip and at the same time streamline your delivery management, you should use printing favorites.
You create your own printing favorites by adding default values or selections for senders, receivers, services, addons, contents, etc.
A printing favorite is not a fixed template, but a tool for you to regulate and limit alternatives when creating a shipment. The degree of regulation can vary and you can create printing favorites for different purposes.
Note
Start by analyzing your needs. You can add as many printing favorites as you want. Remember to optimize for normal cases and not for special cases.
You can use your printing favorite to print directly to a printer or print to PDF. You can also store the shipments for later printing.
The purpose of filtering information is to reduce the number of senders, receivers, services and addons to choose from. For example, you can create a printing favorite that only includes receivers in a particular city.
Tip
We recommend using the category fields when you add receivers to the address book. Use a category as a label for different types of receivers, if you, for example, have several senders and want to tie receivers to one particular sender.
When creating a printing favorite you start with senders and receivers, continue with adding details about services and addons and finally adding details about shipment and parcels.
Note
All sections and alternatives within the sections are optional as you decide the level of detail you need for the printing favorite.
The services, addons and options available depend on what is included in your account.
Senders
Go to > .
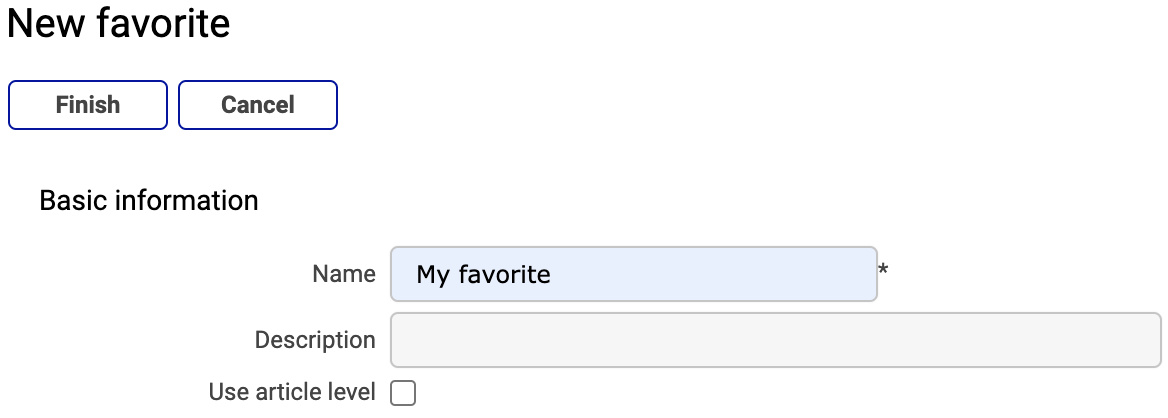
Click and give the printing favorite a name.
Go to the Senders and receivers section and click .
Go to the Sender section.
Create a filter by clicking next to Filter . If you want to change where the information comes from, start by clicking next to Source. Normally, the source is Sender/receiver.
If you always use the same sender, select it as Default sender.
Check the Hidden box if the sender information shouldn't be displayed in the GUI when printing.
Check the Locked box if it shouldn't be possible to change sender.
Select a Default mode for using the printing favorite.
Register new/edit selected, if the mode where you add senders should be set as default.
Select from address book, if the mode where you select senders should be set as default.
Check the Locked to default mode box if it shouldn't be possible to change modes.
Check the Never propose a sender box if the Sender field shouldn't contain a sender from start, to avoid sending from the wrong sender.
Check the Mandatory search value box if a search value must be used.
Check the Only exact search box if it must be an exact match between search value and search results.
Receivers
Go to the Senders and receivers section and click .
Go to the Receiver section.
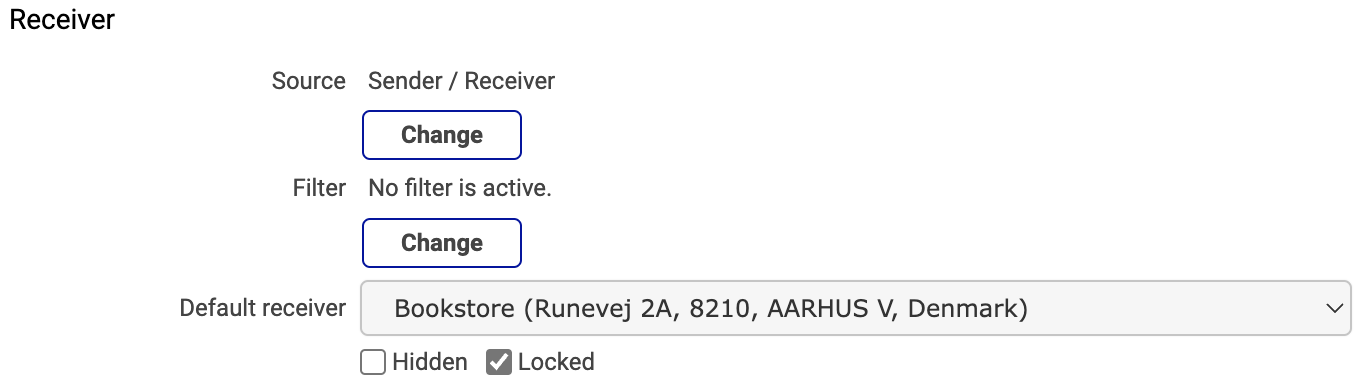
Create a filter by clicking next to Filter . If you want to change where the information comes from, start by clicking next to Source. Normally, the source is Sender/receiver.
If you always use the same receiver, select it as Default receiver.
Check the Hidden box if the receiver information shouldn't be displayed when printing.
Check the Locked box if it shouldn't be possible to change receiver.
Select a Default mode for using the printing favorite.
Register new/edit selected, if the view where you add receivers should be set as default.
Select from address book, if the view where you select receivers should be set as default.
Check the Locked to default mode box if it shouldn't be possible to change views.
Check the Never propose a receiver box if the Receiver field shouldn't contain a receiver from start, to avoid sending to the wrong receiver.
Check the Mandatory search value box if a specific search value should be used, for example, Quick ID.
Check the Only exact search box if it must be an exact match between search value and search results.
When needed, proceed with other address parties and enter details in the same way as for sender and receiver.
Service, addons and options
Go to the Service and addons section and click .
Go to the Service section.
Create a filter by clicking next to Filter .
If you always use the same service, select it as Service.
Check the Hidden box if the service shouldn't be displayed in the GUI when printing.
Check the Locked box if it shouldn't be possible to change service.
Check Normal label, Return label or both.
Check the Hidden box if the label selection shouldn't be displayed in the GUI when printing.
Check Use sender address on label if that should be shown on the label instead of the dispatch address, in cases where dispatch party is used.
Go to the Addons section to add relevant addons. Different addons require different kinds of information.
You can choose to check Hidden, Locked and Select if valid for all addons.
Go to the Options section to add relevant options. Different options require different kinds of information.
You can choose to check Hidden and Locked for all options. For some options you can choose Select if valid.
Shipment and parcels
All fields in the Shipment and parcels section can be defined for the printing favorite. Entering default values, locking values, hiding details, and set fields as mandatory are some examples of how you can control information about shipments and parcels. You can also make settings such as the number of parcels, weight and package codes. These are values that may be mandatory for a service.
Caution
Proceed with caution when hiding or locking mandatory values as it may prevent you from creating a correct shipment when using the printing favorite.
Ignore warnings
In the Ignore warnings section you can make settings that allow you to print shipments that normally should have generated the status ”Warning”.
If you want to show, edit or delete a printing favorite, use the search function.
Go to > .
Click
 to the left of a printing favorite.
Enter relevant shipping information.
Click or to print immediately, or for later printing.
If the printing went well and should be used, click or to start a new print job.
If the printing went well but shouldn't be used, click .
If the printing did not go well, but the problem can be solved immediately, for example, by loading labels, solve the problem and click .
If the printing did not go well, but the problem can be solved later, for example, if the printer is out of order, click and continue when the problem is solved.
Caution
Some carriers communicate via EDI and others via API, which can be important when you discard a shipment.
If you discard a shipment before EDI is sent (EDI carrier):
The carrier receives no information.
If you use the label anyway, the carrier may charge you a penalty - for using a non-EDI label.
If you discard a shipment after EDI is sent (EDI carrier) or if you use an API carrier:
The cancellation only takes place in Delivery and the label is still valid according to the carrier.
If you don't use the label, some carriers may charge a penalty - because they did not receive the parcel they expected.
Contact the carrier if you're unsure of what applies.
If the carrier offers pickup you can book by clicking after printing or do it later in > .
Tip
All methods may not be available for all services. For example, for some services, typically freight services, pickup booking is preselected. For those services it’s not possible to book pickup afterwards.
You can create shortcuts to your printing favorites and easily access them from the left menu in Posti SmartShip.
Printing favorites can be used to complete shipments created through API or XML file integration.
When creating a printing favorite you give it a unique name.
 |
You then use the printing favorite name in the JSON or XML file.
JSON | XML |
{
  "pdfConfig": {},
  "shipment": {
    "ediForward": true,
    "favorite": "My favorite",
    "options": [{
      "id": "free",
      "languageCode": "SE"
    }],
    "parcels": [{
      "copies": 1,
      "valuePerParcel": true
    }],
    "receiver": {
      "address1": "Runevej 2A",
      "city": "AARHUS V",
      "country": "DK",
      "name": "Bookstore",
      "zipcode": "8210"
    },
    "sender": {
      "address1": "Yliopistonkatu 5",
      "city": "HELSINKI",
      "country": "FI",
      "name": "Warehouse",
      "zipcode": "00100"
    },
    "service": {
      "addons": [],
      "id": "FREE",
      "normalShipment": true,
      "pickupBooking": false,
      "pickupDate": "2022-10-19",
      "subId": "13579"
    },
    "test": false
  }
} | <?xml version='1.0' encoding='UTF-8'?>
<data>
<meta>
<val n="favorite">My favorite</val>
</meta>
<shipment>
<val n="from">party1</val>
<val n="to">party2</val>
<service srvid="FREE_13579">
</service>
<ufonline>
<option optid="free">
<val n="language">SE</val>
</option>
</ufonline>
<container type="parcel">
<val n="copies">1</val>
</container>
</shipment>
<sender sndid="party1">
<val n="name">Warehouse</val>
<val n="address1">Yliopistonkatu 5</val>
<val n="zipcode">00100</val>
<val n="city">HELSINKI</val>
<val n="country">FI</val>
</sender>
<receiver rcvid="party2">
<val n="name">Bookstore</val>
<val n="address1">Runevej 2A</val>
<val n="zipcode">8210</val>
<val n="city">AARHUS V</val>
<val n="country">DK</val>
</receiver>
</data> |
Some examples of using printing favorites to complete shipments created through integration
Caution
If a value is provided in both the integration file and the printing favorite, the integration file overwrites the printing favorite in case you don't lock the value in the printing favorite.
For example:
 |
Go to > .
Click .
Give the printing favorite a unique name.
Click in the Senders and receivers section.

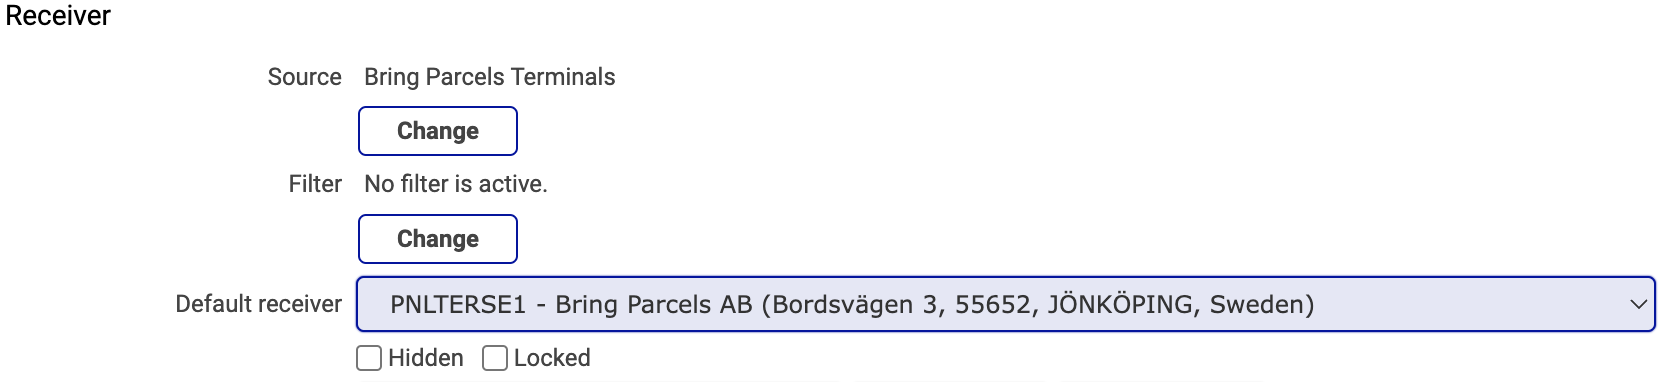
Click under Source in the Receiver section.
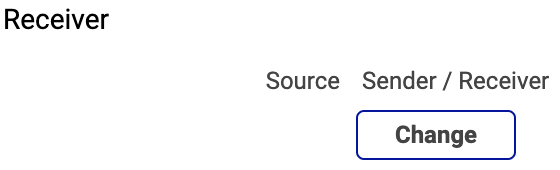
Select a source from the drop-down list in the Source field.

Click .
Select a receiver from the drop-down list in the Default receiver field.
Click and to save your printing favorite.
Go to > .
Click .
Give the printing favorite a unique name.
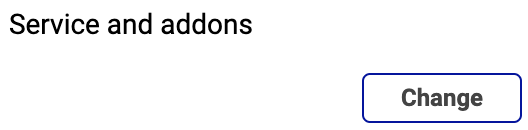
Click in the Service and addons section.
Go to the Addons section and check the Select if valid box next to the additional service you want to use.
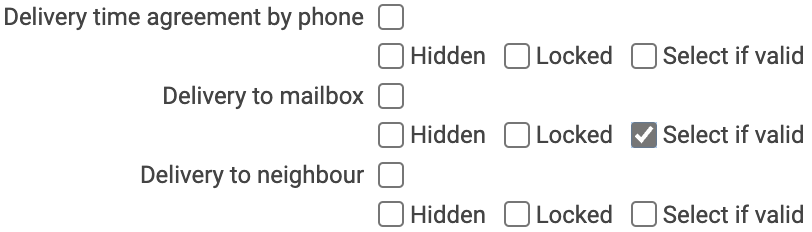
Click and to save your printing favorite.
Caution
If you lock an addon with Select if valid, shipments where the addon is not available will result in an error.
Go to > .
Click .
Give the printing favorite a unique name.
Click in the Service and addons section.
Select a service if it should only apply for that specific service.
Check the Normal label box and the Return label box.

Click and to save your printing favorite.
Go to > .
Click .
Give the printing favorite a unique name.
Click in the Service and addons section.
Check the Pre-notification (email) box in the Options section.
Enter your message in the Message field.
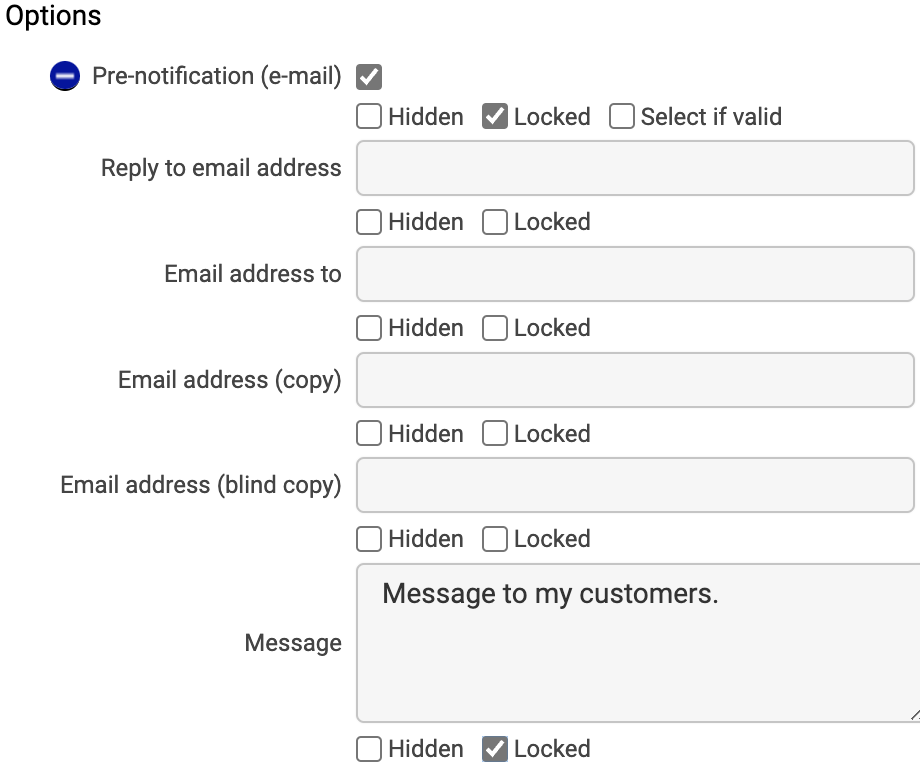
Click and to save your printing favorite.
Go to > .
Click .
Give the printing favorite a unique name.
Click in the Shipment and parcels section.
Select the warnings to ignore in the Ignore warnings section.
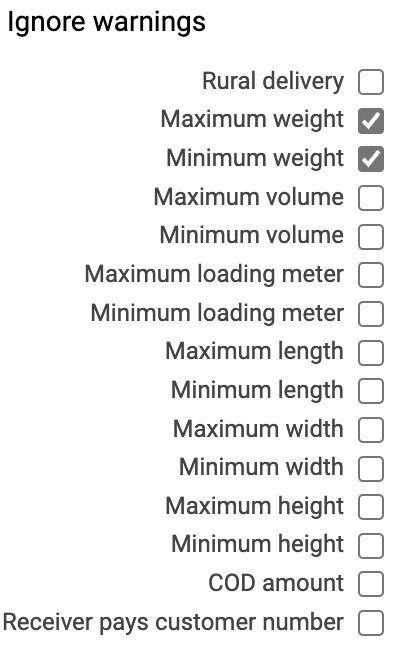
Click and to save your printing favorite.
Go to > .
Click .
Give the printing favorite a unique name.
Click in the Shipment and parcels section.
Check the No direct print of orders with warnings box in the Order import section.
Click and to save your printing favorite.
Standard printing
Use standard printing for single print jobs.
You can print directly to your printer or print to PDF. You can also store the shipments for later printing.
Note
If you want to print labels and shipping documents on a physical printer you need to install OnlinePrinter.
To simplify and streamline the printing function, create printing favorites for your most common cases.
Go to > .
In the Sender and Receiver sections, select
 to use an existing sender/receiver. Select
  to use a new sender/receiver. When you use a new sender you can add your carrier customer number in the CustNo field.
Click to save the sender/receiver. Otherwise the sender/receiver is used only for this shipment.
Note
If you've entered a carrier customer number for the sender and saved it to the address book, please go to > and check if more carrier information is required.
Enter relevant shipment information, such as addons, options and parcel details.
Note
Depending on service, different information is required and/or available.
If you have different types of parcels, for example, 2 parcels of 3 kg each and 1 parcel of 4 kg, you must enter the types separately.
Example
Set No. of parcels to "2" and Weight (kg) to "3". Click .
Set No. of parcels to "1" and Weight (kg) to "4". Click .
You can choose to specify parcel information per parcel or per row. All parcels in a shipment must be specified in the same way.
"Specified per parcel" – the weight and/or the volume are calculated per parcel (2 parcels and 3 kg equals 6 kg).
"Specified per row" – the weight and/or the volume is the total for the parcels (2 parcels and 3 kg equals 3 kg).
Example
2 parcels and 3 kg, and 1 parcel and 4 kg, specified per parcel is 3 + 3 + 4 = 10
2 parcels and 3 kg, and 1 parcel and 4 kg, specified per row is 3 + 4 = 7
The information in the Freight measure section depends on your agreement with the carrier. Carriers use different values and calculation methods.
Click or to print immediately, or for later printing.
If the printing went well and should be used, click or to start a new print job.
If the printing went well but shouldn't be used, click .
If the printing did not go well, but the problem can be solved immediately, for example, by loading labels, solve the problem and click .
If the printing did not go well, but the problem can be solved later, for example, if the printer is out of order, click and continue when the problem is solved.
Caution
Some carriers communicate via EDI and others via API, which can be important when you discard a shipment.
If you discard a shipment before EDI is sent (EDI carrier):
The carrier receives no information.
If you use the label anyway, the carrier may charge you a penalty - for using a non-EDI label.
If you discard a shipment after EDI is sent (EDI carrier) or if you use an API carrier:
The cancellation only takes place in Delivery and the label is still valid according to the carrier.
If you don't use the label, some carriers may charge a penalty - because they did not receive the parcel they expected.
Contact the carrier if you're unsure of what applies.
If the carrier offers pickup you can book by clicking after printing or do it later in > .
Note
All methods may not be available for all services. For example, for some services, typically freight services, pickup booking is preselected. For those services it’s not possible to book pickup afterwards.
The webshop
From the landing page you reach the webshop where you can upgrade your subscription with various add-ons.
Select Upgrade your business.
Select the add-on you want to purchase.
Click .
Click .
Fill in the required text fields (*).
Read and approve nShift's general terms and conditions.
Click .
Tip
The webshop for labels, printers and and other supplies you may need for safe and accurate deliveries is powered by Wallink.
Wallink specializes in offering printers, labels, packaging, and essential warehouse supplies and has established itself as a key player in the industry.
You reach the webshop from SmartShip, by clicking > .